
Creating the input dialog
Creating the input dialog
In the next step, a dialog is created for the input and output of the values. Select the group "Test" and the compound "VAT" in the Input Assistant.
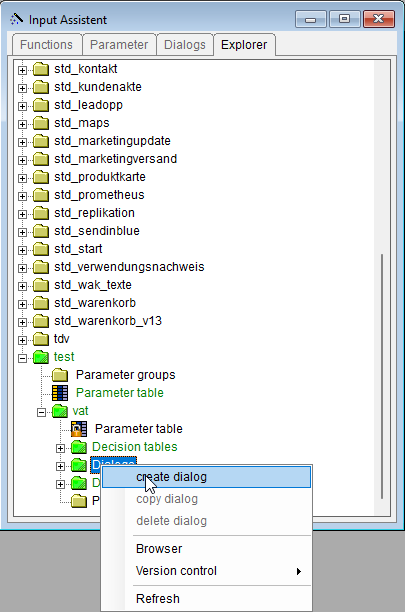
In the right-click context menu, select the entry "Dialog", or go through the menu "File - Create - Dialog" Create the input dialog, named "GrossNetPrice" for example, within the compound "VAT".
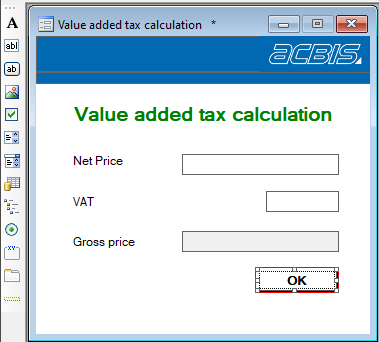
From the dialog elements toolbar, drag and drop the elements onto the dialog as shown in the following image.
Following that, the elements are assigned properties.
.
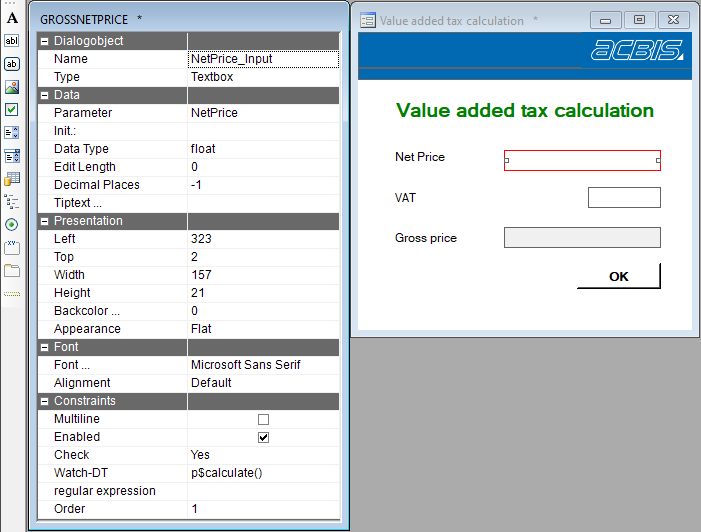
Set up the properties of the input field NetPrice as shown in the image. The input fields need to be associated with parameters. This association can be performed through drag&drop from the Parameters tab of the Input Assistant. The properties Verification and Watch-DT have special significance. If Verification is checked, the decision table specified under Watch-DT is automatically called whenever the value is changed. For NetPrice in this example, the decision table Calculate is specified. This can also be accomplished through drag&drop from the Explorer tab in the Input Assistant. To visualize the calculation, the field GrossPrice is assigned the following properties:
