
Dialogdefinition
Dialogdefinition
The last step in the wizard is to define the dialogs and assign the application characteristics to the dialogs. The desired size of the dialogs can be set.
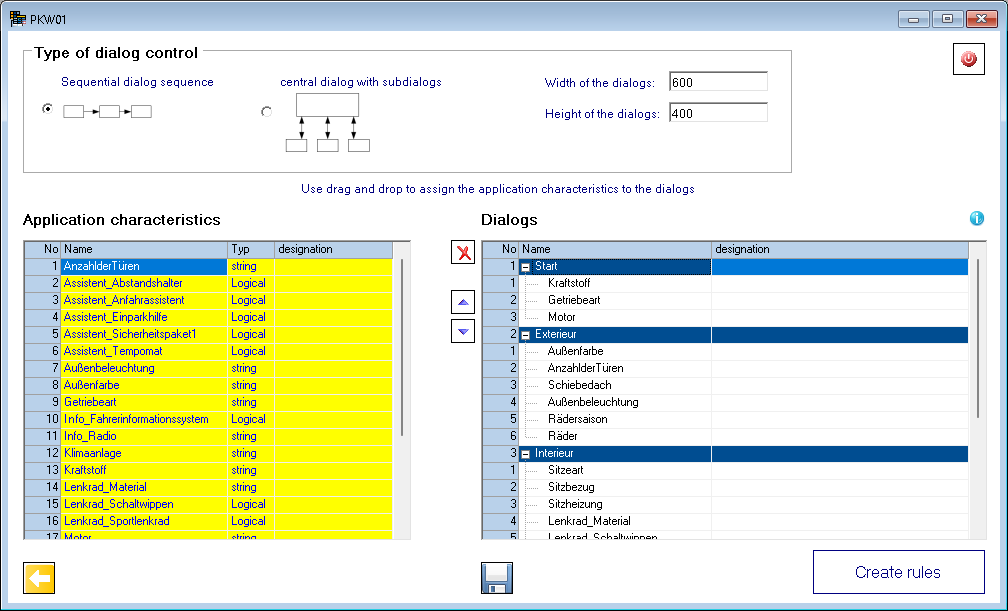
If a large number of application features require several dialogs to display them, you can specify whether the dialogs should be displayed one after the other, or as a main dialog with sub-dialogs. Creating dialogs is done by editing in the right table. A new dialog is created by editing in the line <new>. You can drag and drop the application features into the desired dialogs. It is possible to assign an application characteristic to different dialogs. Only when you try to use a characteristic multiple times in the same dialog, it is colored red. Duplicate characteristics in the same dialog are not saved. All application characteristics assigned to a dialog are colored yellow. The order of the dialogs and the order of the characteristics within a dialog can be changed with the buttons ![]() and
and ![]() .
.
By clicking on the "Create rules" button, the rules for this configuration are generated. The name of the configuration is used as group name. If this group already exists, a backup is created with the current date in the name.
The generated start dialog of the sample data looks like this:
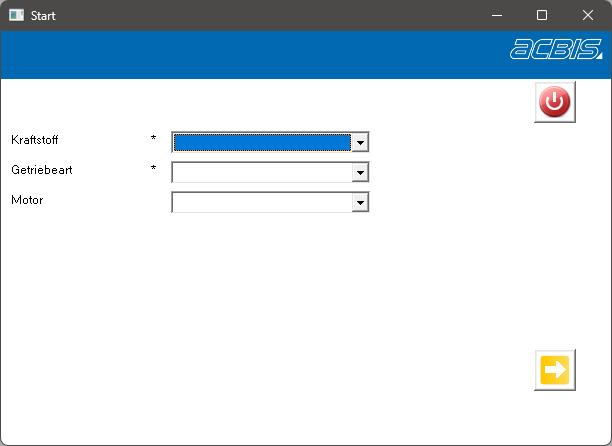
Required fields are marked with a *. All characteristics with default values are filled at the start of the rules. The items of the combination fields are read from the database. These can therefore be changed later without having to re-generate the rule set. For each dialog element, a control decision table is called, which performs checks of the permitted values and fills the assigned technical characteristics.
Example:

Each of these decision tables finally calls a suitable special decision table. These can be used by you to enter individual additions. When generating the rules, the special decision table is not overwritten.